 Before printing our bottle opener from the laser cutter, we finalized the design and decided on the thickness of the plastic we should use. We hesitated between 1/8" and 3/16" inches thick and ended up choosing the 3/16" plastic sheet because we wanted the bottle opener to be sturdy.
The Laser Cutter is a really cool machine and relatively simple to use. Before printing out the design, on the computer, that is connected to the machine, you have to place it on a grid that corresponds with a grid inside the machine. Then you tell the machine where the laser has to start and you adjust the velocity of the laser according to the width of the plastic sheet. and within a couple of seconds... ta da! the laser cuts up your design and it is ready for use!

 Here are some pictures of the Laser Cutter making our bottle opener!
Our bottle opener looks really cool and it is supposed to look like a face, but because of white color of the plastic, it looks more like a ghost.
 Unfortunately when we tried our bottle opener, it did not work. We were worried that the width would be too large and that was exactly the problem. The ridges were not able to fit underneath the cap. We had two solutions for this problem: 1) File down the two ridges 2) Reprint the design on the 1/8" inch plastic sheet. So we tried both!
1st solution:
 We filed down the two ridges on one side of plastic and tried to open a bottle. It worked! Our problem was in fact that the width of the plastic sheet was too large. Now we wanted to see if it would work on a thinner sheet of plastic and prevent us from altering the bottle opener in any way.
2nd Solution:
With the 1/8" inch plastic sheet, o
 ur bottle opener worked! The ridges nicely fit underneath the cap and opened the bottle perfectly! Even with the thinner plastic, the opener was sturdy and didn't seem like it was going to break. It seems that our rectangular design was a good choice because it made the bottle opener less likely to bend and break. We were happy that we were able to fix our problem without making any changes to our original design and that we could finally enjoy our sodas!
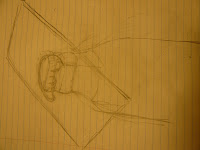
 We first started sketching some ideas and figuring out the dimensions of our bottle opener. Figuring out the oval shape was the trickiest part because we had to make sure it was not too small or too large . The width of the hole that be slightly bigger than the width of the actual bottle cap. The length of the hole was tricky because we wanted to include two ridges that would fit underneath the bottle cap. Our biggest concern was that the ridges would in fact be able to fit underneath the cap. Therefore, we had to make precise measurements and take the width of the plastic sheet into consideration. Here are some of our sketches:
